Stir Fry Crazy

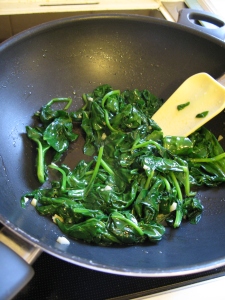
I’ve been using my new Chinese cookbook to make a few Chinese dishes recently, with great results! I love Chinese food, but it can be pretty unhealthy if you get a lot of takeaways… at least if I make it myself I know exactly what’s in it!  Last week, I made tomato, egg and spring onion stir fry, with jasmine rice and a side of garlic spinach. It was incredibly easy to cook, and tasted very good. My Dad particularly enjoyed the garlic spinach (he is a sucker for garlic). It’s a pretty healthy and satisfying meal to make if you don’t have a lot of time to prepare something, and once you have the required condiments in your cupboard, you can use them to make a variety of Chinese dishes. I would definitely recommend making this if you enjoy Chinese food, it is so tasty 🙂 Here’s the recipe. I’ll include one for the garlic spinach too, but you could always make another side, and you don’t have to use jasmine rice. Any rice will do! You should be able to get all these ingredients in your local supermarket, I was able to get them all in Tesco.

Ingredients

For the tomato, egg and spring onion stir fry:

  • 1 tablespoon groundnut oil
  • 2 large ripe tomatoes, cut into 6 wedges, top removed
  • 3 eggs, beaten
  • 1 teaspoon light soy sauce
  • dash of toasted sesame oil
  • sea salt and ground white pepper
  • 1 spring onion, sliced, to garnish

For the jasmine rice:

  • 350g jasmine rice, washed until the water runs clear
  • 600ml water

For the garlic spinach:

  • 1 tablespoon groundnut oil
  • 3 garlic cloves, finely chopped
  • 200g spinach
  • a pinch of salt
  • drizzle of toasted sesame oil

To make the tomato, egg and spring onion stir fry:

  • Heat a wok over a high heat and add the groundnut oil. When the oil starts to smoke, add the tomatoes and stir fry until softened.
  • Pour in the beaten eggs and leave to settle for about a minute, then swirl the liquid egg around the wok, and stir with a wooden spoon to scramble it.

  • Cook for about 2 minutes, then season with the soy sauce, sesame oil, salt and white pepper. Garnish with spring onion and serve immediately.

To make the jasmine rice:

  • Place the rice in a heavy based saucepan and add the water. Bring to the boil, then cover and simmer over a low heat for 15-20 minutes.
  • Uncover the pan and remove from the heat. Drain any remaining water, fluff up the rice with a fork and serve immediately.

To make the garlic spinach:

  • Heat a wok over a high heat and add the groundnut oil. When the oil starts to smoke, add the garlic and stir fry for a few seconds.
  • Add the spinach and stir fry until wilted. You can add a bit of water to help create some steam, which will help to cook the spinach.

  • Season with salt and a small drizzle of sesame oil and serve immediately.

Recipe from ‘Ching’s Chinese Food in Minutes’, with recipes by Ching-He Huang.

I made some more Chinese food today, so I’ll post about that soon. I also made some raspberry brownies recently, as well some Alice in Wonderland themed cupcakes which went down a storm at the party I went to (I should have made more)! I’ve started training for my job, so I might not get much time to post at the moment. I’m really excited to start work! Hope you all have a nice week readers, make sure to eat lots of tasty foods 🙂

Posted in Assorted Chinese Food | Tagged , , , , , , , , | Leave a comment

Happy Birthday To Me

Last week I celebrated my 24th birthday (I’m getting old). My boyfriend and I stayed overnight in Cardiff on the day of my birthday and went for a meal at a Latin American restaurant called Las Iguanas; the food was great and we were both full as eggs afterwards! I also bought a new electric hand mixer, which has turned out to be a godsend! It was surprisingly cheap, but works a treat. I was amazed at how quickly I could cream butter and sugar, no more achy arms for me! I think my next purchase will be a food processor, or maybe a steamer. I was also given a new cookbook for my birthday from my Grandma; it is a Chinese food cookbook, so I’m going to try my hand at making a lot of Chinese dishes over the next few weeks.
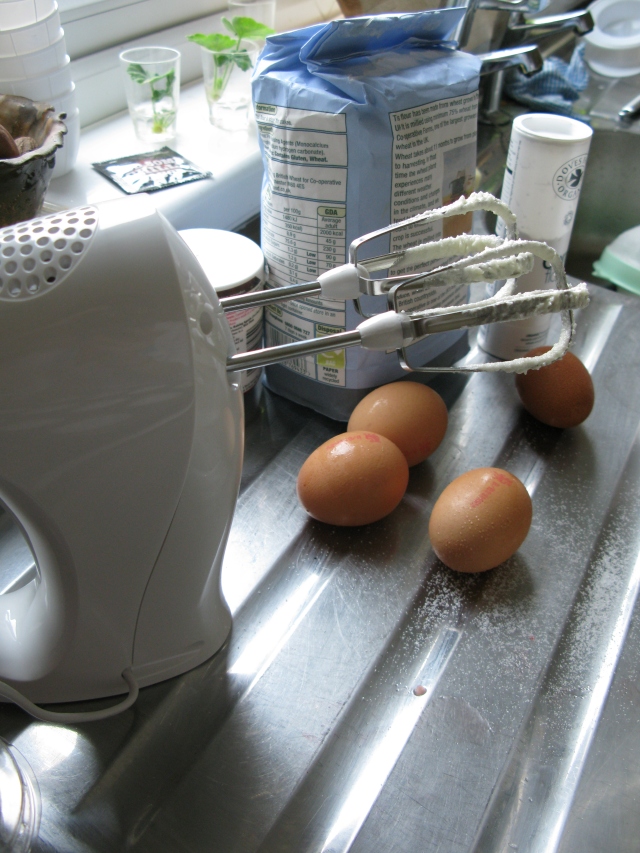
My new purchase!

On the weekend following my birthday, I decided to host a birthday tea and serve up a variety of homemade baked goods. My new hand mixer made making everything a breeze and I was done in half the time I usually take! Before we had the tea, my Mum took us to an amazing ice cream parlour about half an hour’s drive from where we live. It’s called Hapus (happy in Welsh); the ice cream is homemade and all the ingredients for it are locally sourced. I had a strawberry sundae and my boyfriend had a banana split, they looked and tasted amazing!

My ice cream!

For my birthday tea, I made four different things altogether, some of which I’d made before, and some that I’d never tried. Everything turned out really well, so I was very happy. Here’s a list of everything I made for my birthday tea, along with recipes.

1. Raspberry, orange and polenta loaf cake

This loaf is the same as the blueberry one I made not too long ago, so I won’t put the recipe in this post. If you want to make it, use the recipe you can find here: https://kitchenofculinarydelights.wordpress.com/2012/05/02/use-your-loaf/ and just substitute the blueberries with fresh raspberries. I think the loaf tasted even better with raspberries in, they worked very well with the orange flavours and the slight crunch of the polenta. This may just be because I prefer raspberries though! Another fruit that might work well in this loaf is cranberry; it would be a nice thing to make for Christmas. Everyone loves this loaf cake in my family, so it didn’t last long, but it’s easy to make so I think I will bake one regularly from now on.

2. Banana bread with peanut butter

Banana bread is my boyfriend’s favourite, so I thought I would make him some. My friend Cat (check out her blog here: http://forgoodnesscake999.blogspot.co.uk/) gave me this particular recipe for banana and peanut butter bread; I’ve made it once before and it turned out nicely, however I HATE bananas so I never taste it to see what it’s like! I got good feedback on this particular attempt though, and it smelled a lot more peanutty this time because I put a little bit extra in. Sometimes, I find that banana bread doesn’t cook very well in the middle, but this time it seemed okay. My Grandma said that it was lovely and moist, and again it didn’t last long! I don’t enjoy making banana bread because the smell of banana makes me feel sick, but I like to see my boyfriend’s face light up when he eats it, so that makes it all worthwhile 🙂 Here’s the recipe for banana bread with peanut butter. You don’t have to add the peanut butter if you’re not a fan.

Ingredients

  • 375g self-raising flour
  • 250g caster sugar
  • 2 eggs
  • 250ml milk
  • 90g unsalted butter
  • 2 mashed bananas
  • 3 tablespoons smooth peanut butter

Method:

  • Preheat oven to 150C (fan)/170C/330F/Gas Mark 4. Grease and line a 2lb loaf tin.
  • Cream together the butter and sugar until pale and smooth.
  • Add the eggs, one at a time, mixing after each addition.
  • Add the banana, milk and peanut butter.
  • Fold in the flour.
  • Bake for about 1 hour, or until a skewer comes out clean. Leave to cool for 10 minutes before turning out onto a wire rack.

3. Strawberry cupcakes

The weather has been lovely and summery recently, so I decided that strawberry cupcakes would be perfect to have for a teatime treat. The recipe is from my cupcake bible, Cupcakes From the Primrose Bakery, and like all their recipes, these little cakes were divine. I particularly enjoyed the strawberry jam in the middle! I was a bit worried when they came out of the oven because they hadn’t risen much, probably because they were really moist, but the texture inside was lovely. The slight strawberry flavour of the sponge works well with the vanilla butter cream but they would be equally as good with some whipped cream on top. They’re fairly simple to make and with my new hand mixer, they didn’t take long at all. Here’s the recipe.

Ingredients

For the sponge:

  • 225g caster sugar
  • 210g self-raising flour
  • 1 teaspoon baking powder
  • 25g cornflour
  • 125g fresh, ripe strawberries, hulled and crushed
  • 225g unsalted butter, softened
  • 4 large eggs
  • good quality strawberry jam with no bits

For the butter cream:

  • 110g unsalted butter, softened
  • 60ml semi-skimmed milk, at room temperature
  • 1 teaspoon vanilla extract
  • 500g icing sugar

To make the sponge:

  • Preheat the oven to 160C (fan)/180C/350F/Gas Mark 4 and line a 12 hole muffin tray with cupcake cases.
  • Cream the butter and sugar until pale and smooth.
  • Beat in the eggs, one by one, then add the remaining ingredients and beat well together.
  • Carefully spoon the mixture into the cupcake cases, filling them to about two-thirds full. Bake for about 25 minutes. The cakes will be fairly moist even when cooked.
  • Remove from the oven and leave to cool for about 10 minutes, then place on a wire rack.
  • Once the cakes are completely cool, make a small hole in the centre of each cake with a sharp knife. Use a teaspoon to push the jam into the hole. You may need to warm the jam in a saucepan to soften it enough to put into the sponge.

To make the butter cream:

  • In a large mixing bowl, beat the butter, milk, vanilla extract and half the icing sugar until smooth. Gradually add the remaining icing sugar and beat until smooth and creamy.
  • You can also add a fresh whole strawberry to the top of each cupcake if you like. Put them on just before serving though, so the fruit stays fresh.

Recipe from ‘Cupcakes From the Primrose Bakery’, with recipes by Martha Swift and Lisa Thomas.

4. Lemon layer cake

This year I thought I would make my own birthday cake. As you may know, I’ve only ever made one layer cake before (see here: https://kitchenofculinarydelights.wordpress.com/2012/03/02/chocolatelayercake/), and the results were good but a little rough around the edges. I also baked the two cake layers too close together in the oven, and they rose unevenly and burnt slightly on the edges, which meant I had to do a lot of cake pruning… For my lemon cake, I took no chances and baked each layer separately; they came out pretty much perfectly flat and golden brown, so I was able to use each layer straight from the cake tins! No cake pruning required. I was really happy with how the cake turned out; it was almost a shame to eat it as it looked so pretty. I’ve still got some left downstairs so I might have some more with a cup of tea before I go to bed tonight 😛 The sponge was lovely and moist, zesty and light, with the butter cream having plenty of zing from the lemon juice in it. Lemon cake is definitely my favourite cake ever, so I think I might make some lemon cupcakes soon. I’m very proud of this cake, not bad for my second ever attempt at a layer cake 🙂 Here’s the recipe.

Ingredients

For the sponge:

  • 225g golden caster sugar
  • 225g self-raising flour
  • 1 1/2 teaspoons baking powder
  • 25g cornflour
  • 225g unsalted butter, softened
  • 4 large eggs
  • grated zest and juice of 3 lemons

For the butter cream:

  • 110g unsalted butter, softened
  • 2 tablespoons freshly squeezed lemon juice
  • grated zest of 2 unwaxed lemons
  • 500g icing sugar

To make the sponge:

  • Preheat the oven to 170C (fan)/190C/375F/Gas Mark 5. Grease and line two 20cm cake tins.
  • Cream the butter and sugar until pale and smooth.
  • Combine the dry ingredients in a separate bowl. Add the eggs to the creamed mixture, one at a time, mixing for a few minutes after each addition, alternating with the dry ingredients.
  • Add the grated zest and lemon juice and beat well, but do not overbeat.

  • Divide the mixture evenly between the tins and bake for about 25 minutes until raised and golden brown and a skewer comes out clean.
  • Leave to cool in the tins for 10 minutes, then turn out onto a wire rack, peeling off the greaseproof paper.
  • Sandwich the layers together with the butter cream and cover the top with more.

To make the butter cream:

  • In a large mixing bowl, beat the butter, lemon juice, lemon zest and half the icing sugar until smooth. Gradually add the remaining icing sugar and beat until smooth and creamy.
  • You could decorate the top of the cake with sugared lemon slices if you want.

Recipe from ‘Cupcakes From the Primrose Bakery’, with recipes by Martha Swift and Lisa Thomas.

I had a lovely birthday this year. Baking makes me so happy; there’s nothing better than seeing people you love enjoy your creations! Tomorrow, I’m going to make something savoury; it’s from my new Chinese cookbook and is a tomato, spring onion and egg stir fry. I’m also going to try and make some raspberry brownies at some point this week. I’m going to an Alice in Wonderland themed party on Friday, so I’ve decided to make some vanilla cupcakes and ice ‘Eat Me’ onto the butter cream! I hope they will be enjoyed at the party. I’ll post the results of everything soon but for now, have a great rest of the week and happy baking!

Posted in Assorted Baked Goods | Tagged , , , , , , , , , , , , | 1 Comment

Who Wants To Eat Some Millionaire’s Shortbread?

I apologise profusely for the delay in posting this; I’ve spent the last weekend celebrating my birthday with my family and boyfriend, and I had a job interview this week. I got the job, so I’m really pleased, even if it does mean I don’t have as much free time to bake! Just a short post today and I’ll put one up later this week about my birthday baking 🙂

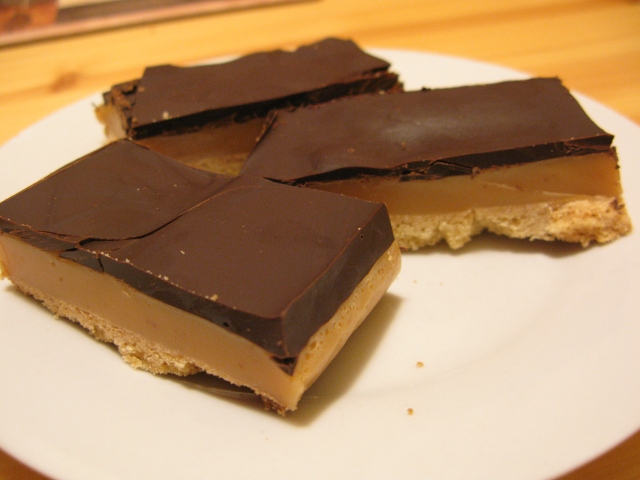
I made this Millionaire’s Shortbread about two weeks ago. It looked very easy to make and I really enjoy caramel shortbread (as does my Dad), so I thought I’d give it a go. I think it turned out really well and it certainly tasted awesome! I’ve never made caramel using condensed milk before, the last time I made it I used sugar and double cream, but I think the condensed milk way is a lot easier and safer, as you aren’t dealing with boiling sugar! Like most tray bakes, this Millionaire’s Shortbread takes hardly any time to do; the most fiddly bit is making the shortbread base. You will get about 12 bars from this recipe, and they keep pretty well so you can keep some in a tupperware box in the cupboard when you need a treat! 🙂

Ingredients

For the shortbread base:

  • 115g unsalted butter
  • 17g plain flour
  • 55g golden caster sugar

For the caramel filling:

  • 175g butter
  • 115g golden caster sugar
  • 3 tablespoons golden syrup
  • 400ml canned condensed milk

For the chocolate topping:

  • 200g plain chocolate, broken into small pieces

To make the base:

  • Preheat the oven to 160C (fan)/180C/350F/Gas Mark 4. Grease and line the base of a 23cm shallow, square cake tin.
  • Place the butter, flour and sugar in a food processor and process until the mixture begins to bind together. If you don’t have a food processor, use your fingers to combine the ingredients and rub in the butter until you get breadcrumbs. Press it into the cake tin and smooth the top. Bake in the preheated oven for 20-25 minutes, until golden.

To make the filling:

  • Place the butter, sugar, golden syrup and condensed milk in a saucepan and heat gently over a low heat until the sugar is dissolved.
  • Bring to the boil and simmer for 6-8 minutes, stirring constantly, until the mixture becomes very thick. Pour over the shortbread base and leave to chill in the refrigerator until firm.

To make the topping:

  • Place the chocolate in a heatproof proof bowl set over a saucepan of gently simmering water and stir until melted. Leave to cool slightly, then spread over the caramel. Chill in the refrigerator until set. Cut the shortbread into 12 pieces to serve.

Recipe from ‘Grandma’s Best Recipes’, with recipes by Beverly LeBlanc.

Stay tuned for a post about my birthday tea. I made a lot of tasty things, including a lemon layer cake and some banana and peanut butter bread! I promise that once I start my new job, I will still try and make something every week as I won’t be working Monday to Friday. Happy baking everyone!

Posted in Shortbread | Tagged , , , , | Leave a comment

Knowing Me, Knowing Stew

Hello again readers. I hope you’ve all had a good week and have eaten lots of nice things 🙂 Last week I made this old fashioned chicken stew. Since my beef stew was such a success, I thought I’d try my hand at making a chicken one, since I prefer chicken to beef. It was a lot easier to make than the beef one, as you don’t have to cook the chicken as long. I was a bit squeamish about cutting up a whole chicken though; I had to get my Dad to help me take the legs off as I couldn’t stand seeing the bones pop out… ugh. I’m such a wimp! I didn’t even know how to quarter a chicken, I had to look online, so don’t worry if you don’t know either. If you really don’t want to cut up a chicken, I suppose you could just use a few chicken breasts, but they won’t flavour the stew as well. Or you could get a whole chicken from a butcher’s, and get the butcher to cut it up for you 🙂 Once the chicken is cooked, the rest of the recipe is pretty easy, and you can put your feet up while the stew simmers. I also made dumplings to go with the stew; my parents don’t like them much but I thought they were tasty and made a nice addition. My Dad said that he preferred the beef stew that I made, but I thoroughly enjoyed this one. The stock was so flavourful because the whole chicken was used, and it thickened up really well. I think I might use a whole chicken to make some more chicken noodle soup in the future. This recipe is once again from my Grandma cookbook, and I used it again to make some Millionaire’s Shortbread today which I’ll post about soon! Here’s the recipe for the chicken stew.

Ingredients

  • 2 tablespoons vegetable oil
  • a 4-5 lb chicken, cut into quarters, backbone reserved
  • 700ml chicken stock
  • 700ml water
  • 4 garlic cloves, peeled
  • 1 bay leaf
  • 4 fresh thyme sprigs
  • 70g butter
  • 2 carrots, cut into 1cm lengths
  • 2 celery sticks, cut into 1cm lengths
  • 1 large onion, chopped
  • 5 tablespoons plain flour
  • 1 1/2 teaspoons salt
  • pepper
  • dash of Tabasco sauce

For the dumplings:

  • 200g plain flour
  • 1 teaspoon salt
  • 2 teaspoons baking powder
  • 1/4 teaspoon bicarb
  • 40g butter, chilled
  • 2 tablespoons thinly sliced spring onions
  • 60ml buttermilk
  • 175ml milk

Method:

  • Put the oil into a large, heavy based flameproof casserole, add the chicken pieces and cook over a high heat, turning frequently, for 10 minutes, until browned all over. If you don’t have a big enough casserole like me, just fry the chicken pieces in a pan one by one instead, then add them to the casserole once they’re browned.

  • Pour the stock and water into the casserole, add the garlic, bay leaf and thyme and bring to the boil.
  • Reduce the heat, cover and simmer for 30 minutes. Remove the casserole from the heat, then transfer the chicken to a bowl and leave to cool. Strain the cooking liquid into another bowl and skim off any fat that rises to the surface.
  • Put the butter, carrots, celery and onion into the casserole and cook over a medium heat, stirring frequently, for 5 minutes. Stir in the flour and cook, stirring constantly, for 2 minutes.

  • Gradually whisk in the reserved cooking liquid, a ladleful at a time. Add the salt and pepper and stir in some Tabasco sauce. Reduce the heat to low, cover and simmer for 30 minutes, until the vegetables are tender.
  • Skin the chicken pieces and remove the meat from the bones, tearing it into chunks. Stir the chunks into the cooked vegetables, cover the casserole and reduce the heat to the lowest possible setting.
  • To make the dumplings, sift the flour, salt, baking powder and bicarb into a bowl. Add the butter and rub in with your fingers until the mixture resembles coarse breadcrumbs. Add the spring onions, buttermilk and milk and stir with a fork into a thick dough. My dumplings were very sticky and I had to add more flour, so you may want to use a bit less milk. I’d say add it a little at a time until the mixture comes together enough to shape into balls.

  • Increase the heat under the casserole to medium and stir well. Shape the dumpling dough into large balls and add to the casserole. Cover and simmer for 15 minutes, until the dumplings are firm and cooked in the middle. Remove from the heat and serve immediately.

Recipe from ‘Grandma’s Best Recipes’, with recipes by Beverly LeBlanc.

This stew is good to eat if you’re feeling a bit down and want some comfort food, or if you need warming up after a cold day. The weather is finally getting warmer though, so I might start making some more summery dishes now. I hope the weather stays nice, as it’s my birthday this week 😀 I’ve been told that I’m getting a new recipe book, hooray! Thanks for reading everyone and happy cooking.

Posted in Stew | Tagged , , , , | 2 Comments

Pomegreat Mini Tarts

Last weekend I made these cute little pomegranate mini tarts. They have a soft pomegranate cake filling, and a cream cheese topping. I got the recipe here: http://www.instructables.com/id/Pomegranate-Cake-Tarts/

I decided to make them because my friend (the one I made the chocolate cake for) asked me to find a recipe for pomegranate cake because he likes pomegranate juice, and this was one of the nicest looking recipes I found online. I was a bit apprehensive about making these mini tarts, as they seemed quite involved and the recipe said to use an electric mixer, which I don’t have 😦 I was also a bit worried about putting tart pastry straight into a cupcake tin, as I was sure that it would stick to the sides and completely ruin the tarts. However, that didn’t happen; I made sure I greased the tin well and they actually popped out fairly easily. The one thing that I was a bit disappointed with was the colour of the tart filling. In the online recipe, they are a lovely shade of pink, and mine didn’t turn out this way at all. They were slightly pink inside but nowhere near as colourful as I was expecting. I think it may have been the type of pomegranate juice I used, I used a brand called Pomegreat (hence the blog title), which is not from concentrate and organic, so the online recipe may have used a brand with more artificial colourings in or something. Another slight problem was that I had to convert the online recipe’s measurements as they were in cups not grams, so I may have worked this out wrong. Despite this, the mini tarts were very tasty, with the pomegranate coming through as a nice aftertaste, and if I make them again I can always use a drop of food colouring to increase their pinkness 😉

Ingredients

For the tart:

  • 260g plain flour
  • 1/2 teaspoon baking powder
  • 1/4 teaspoon salt
  • 115g butter
  • 110g brown sugar
  • 50g sugar
  • 1 egg
  • 1/2 teaspoon vanilla
  • 5 tablespoons finely chopped white chocolate

 For the filling:

  • 200g sugar
  • 3 eggs
  • 200g plain flour
  • 240ml pomegranate juice
  • 60g melted butter
  • 1 teaspoon baking powder
  • 1 teaspoon vanilla

 For the topping:

  • 130g confectioner’s sugar
  • 230g softened cream cheese
  • 1 teaspoon vanilla

 To make the tart:

  • Preheat your oven to 180C/160 fan/350F. In a large mixing bowl, add the of butter with the brown and regular sugar. Make sure the butter is softened.
  • After the mixture looks like a crumble, add the plain flour, along with the salt and baking powder. Beat until the mixture starts clumping up a bit. Add the egg, vanilla, and chocolate to the mixture as well.

  • Roll out the dough on a floured surface and make sure your rolling pin is floured as well. The dough shouldn’t be too thick (just thick enough to prevent ripping). Use a bowl that has around a 4 inch diameter to cut circles in the dough.

  • Grease a cupcake tin with melted butter. Put each of the circles in its own cupcake spot and even out the sides. Make sure the pastry goes all the way up the sides. Place the cookies in the oven for 10 minutes. Don’t worry if they’re not done because they are going in the oven again after adding the cake mixture. If they have risen up use a fork to flatten them.

To make the filling:

  • Add all three eggs and the sugar and blend until creamy. Sift your flour and add it to the mixture. Add the vanilla too. Beat until well combined.
  • Add the cup of pomegranate juice to the mixture and beat again. Add the baking powder and the melted butter and mix until well combined.

  • Pour the cake batter into each of the cookie crusts. It’s okay to overfill the crust a little (as long as you greased the pan well). Put the tarts into the oven for about 5 minutes or just until a toothpick comes out clean when inserted into the cake. Let cool.

To make the topping:

  • Gather the ingredients for the frosting while waiting for the tarts to cool. Cream the cream cheese, sugar, and vanilla in a mixer until smooth.


If you have a go at making these, I would love to see the results to see if you can get yours to be lovely and pink! The other day, I had another go at making a stew, this time a chicken one, with dumplings. Expect the results to be posted very soon. Happy baking everyone.

This is the inside of one of the tarts. Not pink enough! 😦

Posted in Tarts | Tagged , , , , | 2 Comments

Uncle Tom Cobbler

Hello readers, I hope you’ve all had a nice bank holiday weekend. Time to update you all on my cooking adventures this week!

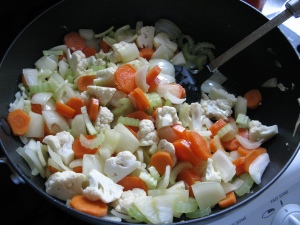
My savoury meal last week was this vegetable cobbler. A cobbler is a pie without a bottom or a sides, it just has a pastry lid. I decided to make this because it’s been pretty cold so far this month, and the cookbook said it was a hearty, warming dish. The recipe said to put swede in, but I don’t like it much, so I just put extra carrots in! I guess you could use whatever vegetables are your particular favourites; some aubergine would have been nice in it. Overall, the cobbler was fairly easy to make, although I think the pastry top would have worked better if I had put everything in a rectangular dish; however, I didn’t have one and can’t really afford to buy one at the moment, so I just used my casserole dish. Because I used this, I had to layer up the pastry a bit and you couldn’t see so much of the filling through the top of the cobbler, but it still cooked well and tasted good. I think I could have left it in the oven for a bit longer though, as the top wasn’t completely brown.  This dish is ideal for a winter warmer or if you want some comfort food. It is very hearty and filling; I had one serving and was stuffed! I think I might make it again with a different assortment of vegetables next time.

Ingredients

  • 1 tablespoon olive oil
  • 1 garlic clove, crushed
  • 8 small onions, halved
  • 2 celery sticks, sliced
  • 225g swede, chopped
  • 2 carrots, peeled and sliced
  • 1/2 small head of cauliflower, broken into florets
  • 225g button mushrooms, sliced
  • 400g canned chopped tomatoes
  • 55g red lentils, rinsed
  • 2 tablespoons cornflour
  • 3-4 tablespoons water
  • 300ml vegetable stock
  • 2 teaspoons Tabasco sauce
  • 2 teaspoons chopped fresh oregano

For the pastry topping:

  • 225g self-raising flour
  • pinch of salt
  • 4 tablespoons butter
  • 115g grated mature Cheddar cheese
  • 2 teaspoons chopped fresh oregano
  • 1 egg, lightly beaten
  • 150ml milk

Method:

  • Preheat the oven to 180C/160 fan/350F/Gas Mark 4. Heat the oil in a large frying pan, add the garlic and onions and cook over a low heat for 5 minutes. Add the celery, swede, carrots and cauliflower and cook for 2 to 3 minutes.

  • Add the mushrooms, tomatoes and lentils. Place the cornflour and water in a bowl and mix to make a smooth paste. Stir into the frying pan with the stock, Tabasco sauce and oregano. Transfer to an oven proof dish, cover and bake in the preheated oven for 20 minutes.

  • To make the topping, sift the flour and salt together into a bowl. Add the butter and rub in it, then stir in most of the cheese and oregano. Beat the egg with the milk in a small bowl and add enough to the dry ingredients to make a soft dough. Knead, then roll out onto a lightly floured surface to 1cm thick. Cut into 5cm rounds.

  • Remove the dish from the oven and increase the temperature to 200C/180 fan/400F/Gas Mark 6. Arrange the dough rounds around the edge of the dish, brush with the remaining egg and milk mixture and sprinkle with the reserved cheese. Return to the oven and cook for a further 10-12 minutes.

Recipe from ‘Grandma’s Best Recipes’, with recipes by Beverly LeBlanc.

I might try making another cobbler style pie in the future, possibly a chicken one. I have a recipe for one in my Grandma book, but I will need to buy more ramekins for it. It’s my birthday next week, and I’ve asked for some money so I can buy new kitchen items 🙂 Have a great week everyone, happy cooking!

http://en.wikipedia.org/wiki/Uncle_Tom_Cobley

Posted in Pies | Tagged , , , | 3 Comments

Use Your Loaf

Last week, I made this gorgeous blueberry, polenta and orange loaf cake. I previously used polenta in some blueberry cupcakes, and didn’t get to try any of those, so I wanted to see what polenta was like when used for baking. I subsequently found after tasting this loaf that it creates a very pleasant, slightly crunchy texture. The blueberries were so tart and juicy (I used really plump ones), and combined with the orange zest and juice, the overall taste was lovely. The loaf took about 15 minutes to prepare, so it’s a good thing to make if you’re busy but still fancy something sweet to eat, as you can leave it baking in the oven while you get things done. I’m going to make it again for my birthday tea, but use raspberries instead of blueberries 🙂 I got the recipe from the Daily Mail newspaper (so that paper is actually good for something!) but I think it’s originally from BBC Good Food magazine. This loaf cake has been one of the nicest things I’ve made so far; my Mum and Dad loved it so much that it was gone a day after it was made. Give it a go, you won’t be disappointed!

Ingredients

  • 100g polenta
  • 200g self-raising flour
  • 140g caster sugar
  • 1/2 teaspoon baking powder
  • 140g unsalted butter
  • zest of one orange
  • 2 tablespoons orange juice (about 1/2 an orange)
  • 1 large egg
  • 200g fresh blueberries

Method:

  • Preheat oven to 140C (fan)/160C/gas mark 3. Line a 2lb loaf tin with baking parchment.
  • Put the polenta, flour, sugar, baking powder, butter and orange zest into a food processor and pulse until the mixture resembles breadcrumbs. If you don’t have a food processor (I don’t) then just use your fingers to rub the butter into the flour to make breadcrumbs, then add the other ingredients and use your hands to mix them all into the flour and butter.

  • Combine the orange juice and egg, then pour this into the dry ingredients and pulse until the mixture forms a ball of dough. Again, if you’re making this by hand, just stir with a wooden spoon, or use your hands until the mixture comes together into a ball.

  • Push half the dough into the lined tin and scatter with half the blueberries. Cover the berries with the remaining dough and finish with the remaining berries.

  • Bake for one hour to one hour ten until a skewer inserted into the loaf comes out clean. Leave to cool in the tin for 10 minutes, then remove onto a cooling rack. Cool completely before eating.

I made a vegetable cobbler today, so I’ll post about that very soon. It was pretty tasty. I haven’t decided what to do for my sweet concoction this week, so I’ll have a little think and let you know. I’m tempted to try Millionaire’s Shortbread, but we’ll see! Thanks for reading.

Posted in Loaf Cake | Tagged , , , , , , | 1 Comment

You Say Potato, I Say Pancakes

Hello readers, I have nearly got all my stuff out of the way for the JET Programme so I thought I’d better catch up on my blogging. By next week my medical form will have been sent off, and then I’ll just have to wait for my police reply to prove that I’m not a loony criminal! Can’t wait to get it all sorted, but I still won’t be able to relax as I have to wait for a possible phone call from JET to say I’ve got a place… being an alternate candidate is a bit of a pain but at least they didn’t say no 🙂 Wish me luck!

I had a productive time in the kitchen last week, despite having a pretty busy week of chest X-rays and other such nonsense… on Thursday I made some potato pancakes. I’d been fancying the recipe from my Grandma cookbook for a while so I decided to give it a go. I also made some coleslaw to go with the pancakes as I didn’t fancy serving them with a carb-heavy side. Like most of the things I make, they were very easy to do and pretty tasty, a nice light bite. I don’t usually like potato much, but I quite enjoyed the taste and texture of these pancakes. I topped them with sour cream, chives and smoked salmon, but you could top them with anything you fancy. I’ve included the recipe for the coleslaw too, as it’s very yummy and goes well with the potato pancakes.

Ingredients

For the coleslaw (serves 4):

  • 75ml mayo
  • 75ml natural yoghurt
  • dash of Tabasco sauce
  • 1/2 a head of white cabbage
  • 2 carrots
  • 1/2 a green pepper
  • salt and pepper

For the pancakes (makes 12):

  • 4 large potatoes, peeled and coarsely grated
  • 1 large onion, grated
  • 2 eggs, lightly beaten
  • 55g fine matzo meal (or breadcrumbs)
  • 1 teaspoon salt
  • pepper
  • sunflower oil, for frying
  • sour cream, smoked salmon and chives to serve (or toppings of your choice)

To make the coleslaw:

  • Mix the mayo, yoghurt, Tabasco sauce, and salt and pepper to taste together in a small bowl. Chill in the fridge until you need it.
  • Remove the tough centre stalk of the cabbage and finely shred the leaves.
  • Peel then roughly grate the carrots.
  • Chop the pepper into thin strips.

  • Mix the vegetables together in a large bowl. Pour over the dressing and toss until the vegetables are well coated. Cover and chill in the fridge until needed.

To make the pancakes:

  • Preheat the oven to 90C (fan)/110C/225F/gas mark 1/4 and line a heatproof plate with kitchen paper. Working in small batches, put the grated potatoes on a tea towel, fold it over and squeeze to extract as much water as possible.

  • Put the potatoes in a large bowl, add the onion, eggs, matzo meal (or breadcrumbs) and the salt. Add the pepper to taste and mix together.
  • Heat a large, heavy based frying pan over a medium-high heat. Add a thin layer of oil and heat until hot.
  • Drop two tablespoons of the potato mixture into the pan and flatten slightly. Add as many pancakes as will fit without overcrowding the pan.

  • Fry for two minutes or until crisp and golden underneath. Flip over and continue frying for a further two minutes until golden on both sides.
  • Repeat this process using the remaining batter. Meanwhile, transfer the cooked pancakes to the prepared plate and keep warm in the preheated oven. Add extra oil to the pan between batches if necessary.
  • Serve the pancakes hot, topped with whatever you fancy!

Recipe from ‘Grandma’s Best Recipes’ with recipes by Beverly LeBlanc.

I hope you enjoy making these pancakes if you decide to give them a go; they take no time at all to make and are perfect if you don’t fancy a massive meal. I’ll post my sweet treat blog soon; I made a delicious blueberry, polenta and orange loaf which didn’t last long! Have a great week and happy cooking 🙂

Posted in Pancakes, Sides | Tagged , , , , , , , | 2 Comments

Peanut Butter Cookies (and a Baseball Bat)

Again, sorry for the delay in posting this, I’ve been sorting out stuff for my application to the JET Programme. I’ve nearly done my medical form, just need to get a chest X-ray to check I’m not riddled with TB! I hope I can get everything done in time.

Just a short post about the peanut butter cookies I made for my boyfriend’s Easter gift. He really enjoys both cookies and peanut butter so I thought these were an obvious choice for him. The addition of orange zest (and a bit of juice if you fancy) give an interesting combination of tastes but the peanut butter definitely comes through strongly. For an extra peanut fix, you could peanuts instead of chocolate chunks as I did, but make sure you use unsalted ones! My parents also enjoyed these cookies; my Mum took some with her when she ran the Brighton marathon last weekend. I’ll be making these again as they were simple to make, tasty and moreish!

Here’s the recipe for peanut butter cookies. It’s a Paul Hollywood recipe from the Good Food Channel website.

Ingredients

  • 45 g smooth peanut butter
  • 50 g butter, softened
  • 50 g caster sugar
  • 45 g light brown sugar
  • 1 egg, beaten
  • 100 g plain flour
  • 10 g baking powder
  • grated zest from the quarter of 1 oranges and a few drops of juice (optional)
  • 50 g chocolate chunks or chopped unsalted peanuts

Method:

  • Preheat the oven to 180°C/gas 4.
  •  In a mixing bowl, cream together the peanut butter, butter, caster sugar and light brown sugar for 4 minutes until well-blended.
  • Add in the beaten egg and mix for a further 2 minutes.

  • Add the flour, orange zest (and juice if using) and baking powder, then mix in the chocolate chips or peanuts.

  • Divide the mixture into 20 even-sized balls and place them onto a lined baking sheet, spacing them well apart. Press each ball lightly with a fork.

  •  Bake for 25 minutes until set. Cool on a wire rack.

Although my cookies look nothing like the picture on the website I got the recipe from, they still tasted pretty good and didn’t last long! 🙂

I’m going to have a go at making a blueberry, polenta and orange loaf this week (if I have time). With all this stuff I have to do for JET, posts may be a bit few and far between, but I will do my best. Have a good week everyone 🙂

Posted in Cookies, Uncategorized | Tagged , , , , , , | 1 Comment

Burger Time – Let’s Get Cookin’!

Wow, it seems like a very long time since I posted anything, so apologies for that. I’ve been away from home for the past week, and I’ve been rushing around sorting out stuff for a job application since I came back. Normal service will resume this week though! 🙂

Last week I decided to try my hand at making homemade burgers and chunky chips. I do enjoy a nice burger especially if it is handmade; when I was at University I used to go to this amazing bar and grill called Voda that did the most delicious homemade burgers with every topping and variation you can think of! I miss that place a lot. My own burgers turned out well and I was surprised at how easy they are to make. I probably should have made the patties slightly thinner though as when the burger was assembled, it was a bit like a leaning tower of burger… but they were yummy! I used lettuce leaves, tomato slices, fried red onions, gherkins, ketchup and Gouda cheese as the toppings for my burgers but you could use whatever you fancy! I’m going to put olives and feta cheese in next time. The chips I made were also a great success – they were crunchy on the outside and quite fluffy on the inside; I used Rooster potatoes to make them. These burgers would be perfect for a BBQ with friends and are much nicer than shop bought ones! Why not give them a try? The recipe will make six burgers.

Ingredients

For the chunky chips:

  • 450g potatoes, peeled
  • 2 tbsp sunflower oil

For the burgers:

  • 1kg fresh beef mince
  • 1 small onion, grated
  • 1 tbsp chopped fresh parsley
  • 2 tsp Worcestershire sauce
  • 2 tbsp sunflower oil
  • salt and pepper

To serve:

  • 6 burger buns, split and toasted
  • toppings of your choice!

To make the chunky chips:

  • Preheat the oven to 200C/400F/gas mark 6. Cut the potatoes into thick, even sized chips. Rinse them under cold running water.

  • Place in a bowl, add the oil and toss together until coated.
  • Place on a baking tray and bake for about 40 minutes, turning halfway through.

To make the burgers:

  • Put the beef, onion and parsley into a bowl, add the Worcestershire sauce, season to taste with salt and pepper and mix well with your hands until thoroughly combined.

  • Divide the mixture into six equal portions and shape into balls, then flatten gently into patties. If you have time, chill in the fridge for about half an hour to firm them up.

  • Heat the oil in a large frying pan. Add the burgers in batches and cook over a medium heat for 5 to 8 minutes on each side.

  • Serve in toasted buns with toppings of your choice!

Recipe from ‘Grandma’s Best Recipes’ with recipes by Beverly LeBlanc.

My next post will be about the peanut butter cookies I made for my boyfriend for Easter. I’ve decided that I love peanut flavour baked goods, so I’m going to be making a lot of them in the future! I’ve found a recipe for peanut butter blondies – yum yum! I’ll post again very soon so stay tuned. Happy cooking!
Posted in Burgers | Tagged , , , , , | 1 Comment